Expanding disk space is a common task for a Virtual Machine. This article describes the process of expanding an existing Azure Virtual Machines Disk. Please note prior to the steps described in this guide, all QuerySurge processes should be shutdown as the the Virtual Machine will need to be stopped and Deallocated.
Azure Portal
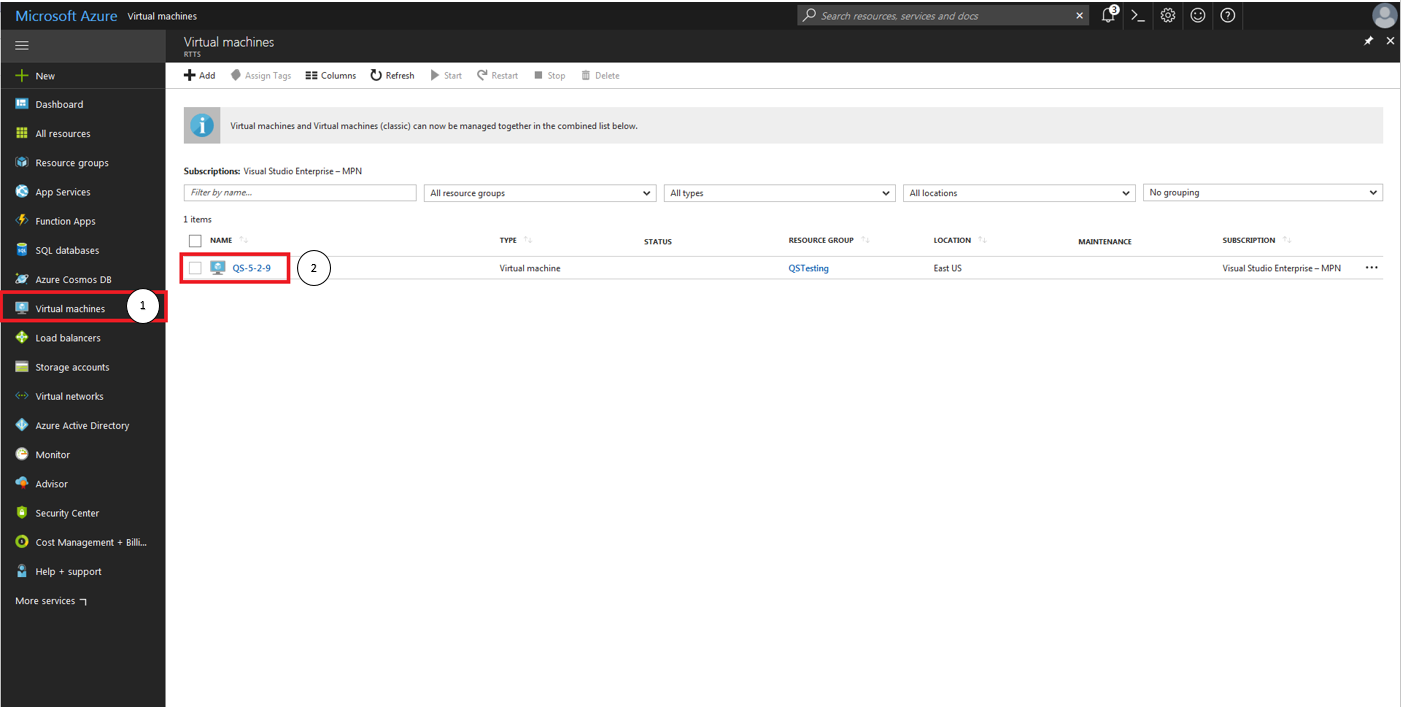
1. Using the left Navigation select "Virtual machines". Locate the Virtual Machine to upgrade and click its name.
2. Stop the VM

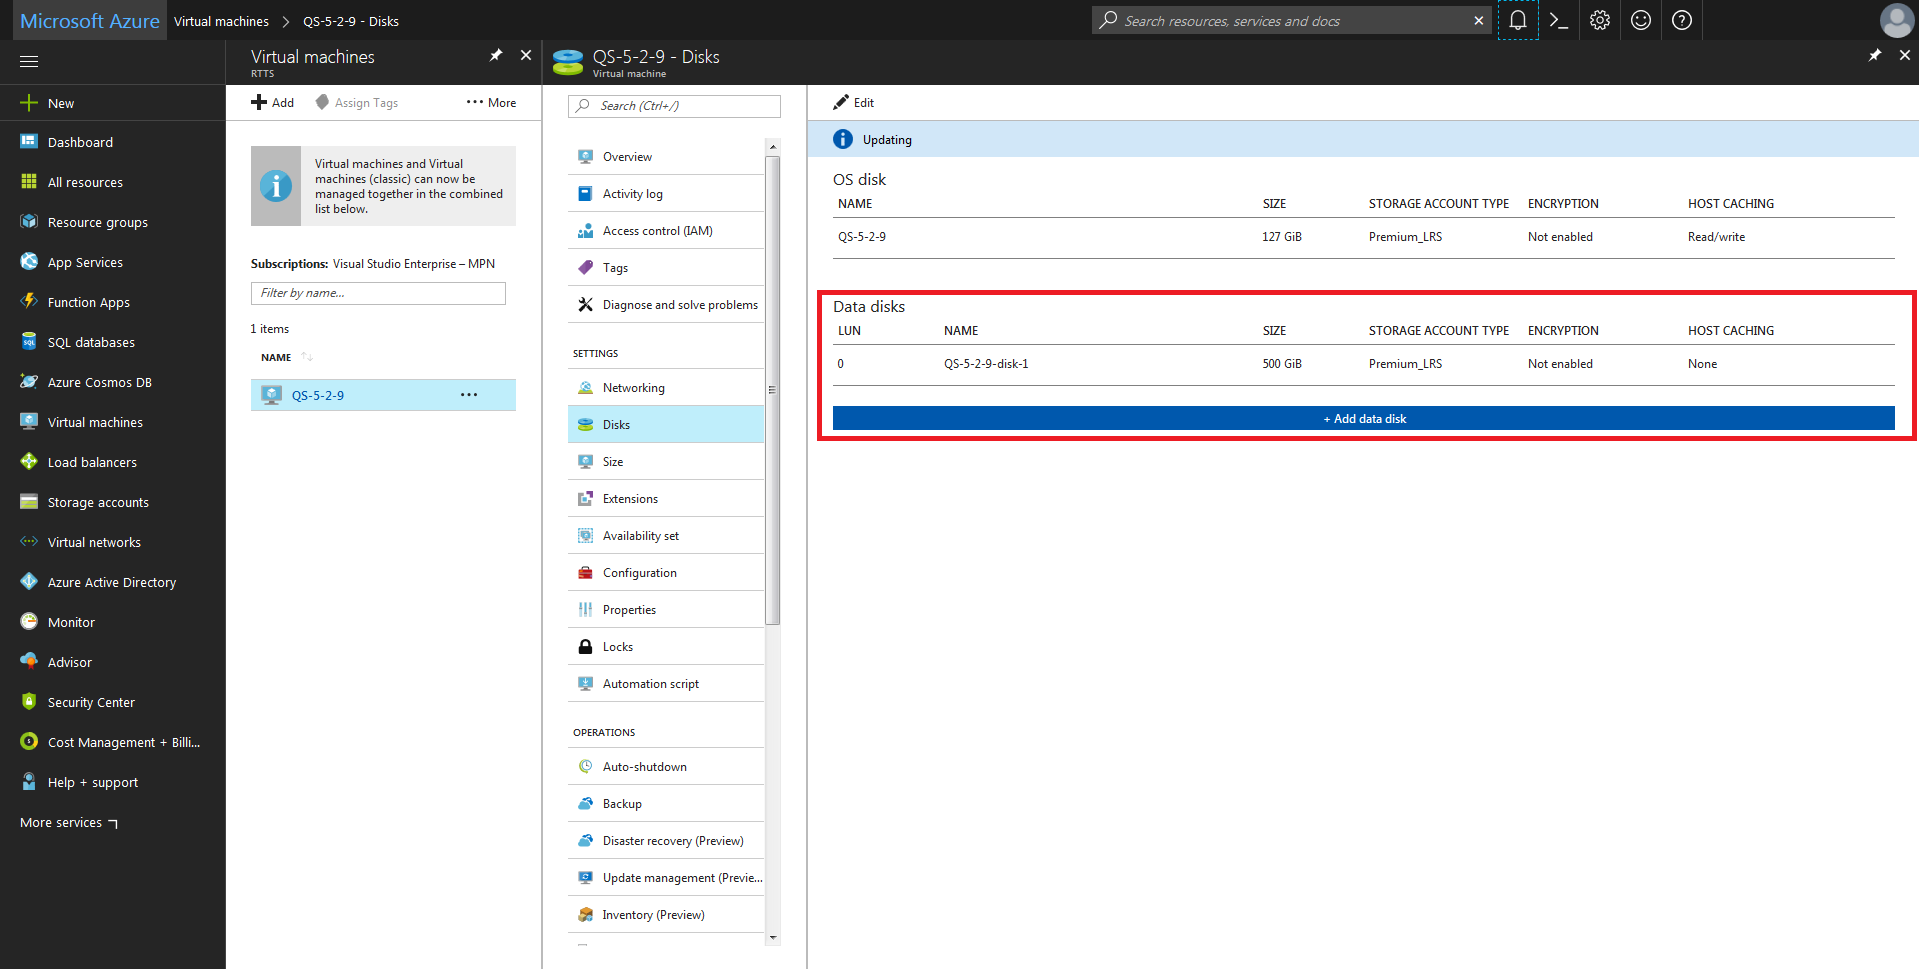
3. Select "Disks" from the left navigation window of the Virtual Machine.

4. Locate the disk which needs to be expanded. In this case Data Disk Lun 0 and click on the disks name.
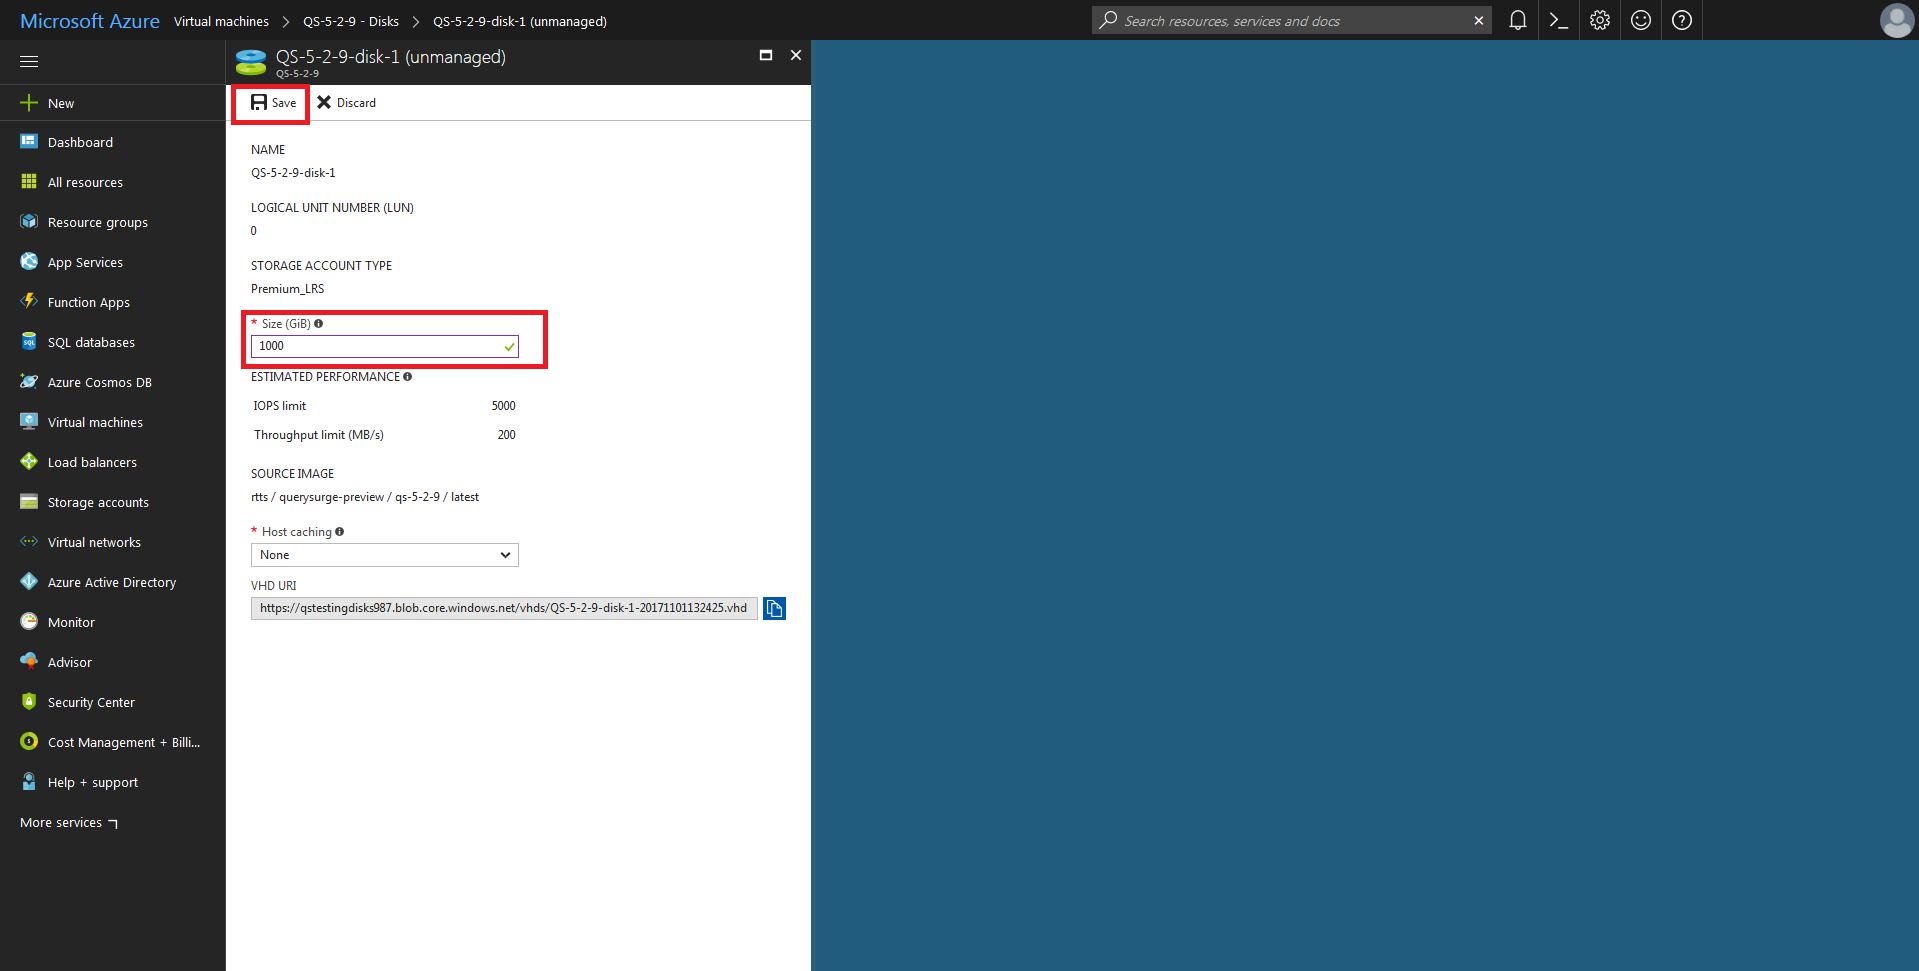
5. Alter the "Size" field of the disk. Please note Azure VM's allow disks up to 2 TB, additionally disks can only be increased in size not decreased.
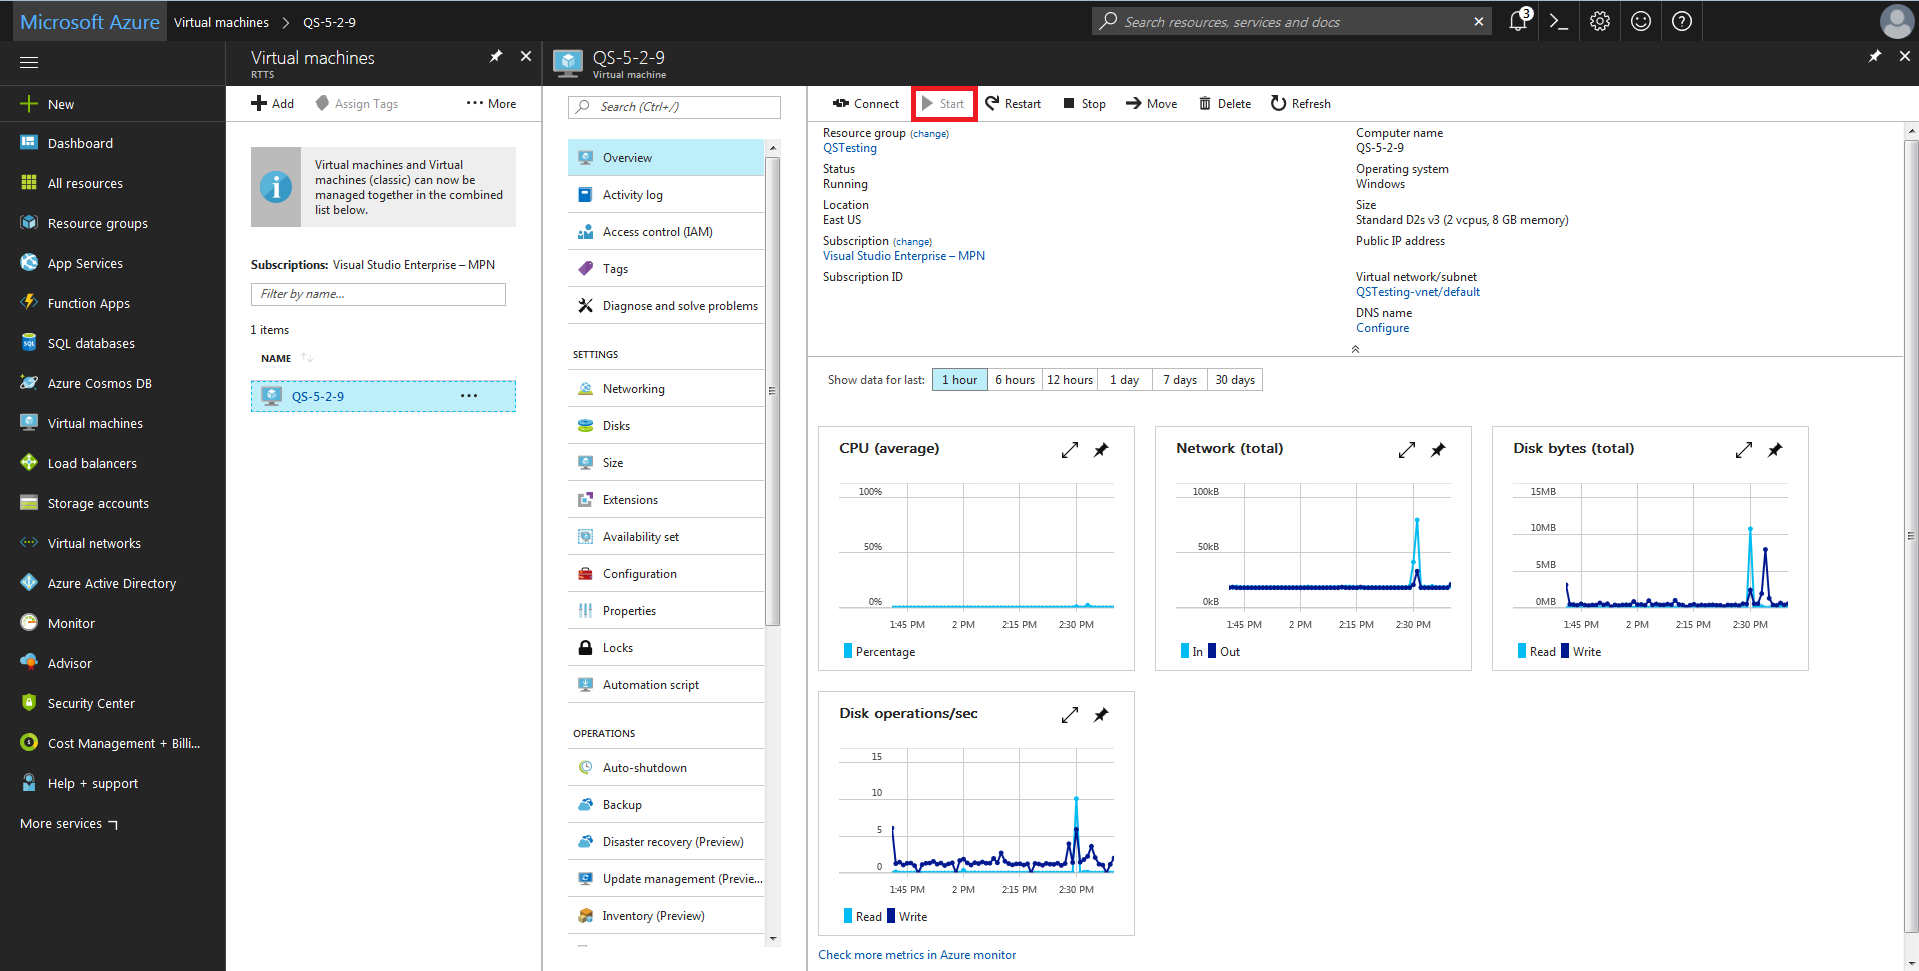
6. Start the Virtual Machine
Virtual Machine Configuration
1. Connect to the Virtual Machine using RDP.
2. Click "File and Storage Services" under Server Manager. Server Manager should automatically open, if not it can be found in the start menu.

3. Under Volumes select Disks.

4. Click the disk which was updated in the azure portal. The volumes section will be updated, right click the volume and select "Extend Volume"

5. Enter in the new size of this volume (Should match what was entered in the Azure portal)
