 Note: This article describes the setup for SQL Server Windows Authentication for non-Azure SQL Server instances. For Azure-based SQL Server with Windows Authentication, see Microsoft's article on Azure Active Directory authentication.
Perform the following steps for every installed QuerySurge Agent:
- Download a SQL Server JDBC Driver version appropriate for your SQL Server instance. Microsoft's version matrix can be found here. Find the Java version that your QuerySurge App server runs by logging in as a QuerySurge Admin user, navigating to the Admin view and by clicking on Server Properties in the Admin tree. Check for Java Version in the main panel.
- Expand the package. Note the directory where you have expanded the package. Select a driver jar appropriate for your Java version.
- You will need local administrator rights on your QuerySurge Agent install boxes to complete the remaining steps.
- Confirm that your QuerySurge Agent is not running. If an Agent is running, stop the Agent Service (Start Menu > All Programs > QuerySurge > Stop Agent Service).
- SQL Server Driver deployment
-
SQL Server Driver. To deploy the driver, find the sqljdbcXX.jar file and copy it from your directory and paste it into the following directory (where XX is a version number):
<QuerySurge Install Directory>\QuerySurge\agent\jdbc\
(By default, this directory is: C:\Program Files\QuerySurge\agent\jdbc.)
-
SQL Server Driver. To deploy the driver, find the sqljdbcXX.jar file and copy it from your directory and paste it into the following directory (where XX is a version number):
- You must also deploy an integrated authentication dll (dll) for the SQL Server driver.
-
sqljdbc_auth.dll (or mssql-jdbc_auth-<version>.x64.dll for more recent versions of the driver) must be copied to a folder on the Windows PATH (environment variable) of each Agent machine. Directories on the Windows PATH that are commonly used for this purpose include: C:\Windows or C:\Windows\System32
<unzip directory>\..\enu\auth\x64\<sqljdbc_auth.dll> or <mssql-jdbc_auth-<version>.x64.dll>
-
sqljdbc_auth.dll (or mssql-jdbc_auth-<version>.x64.dll for more recent versions of the driver) must be copied to a folder on the Windows PATH (environment variable) of each Agent machine. Directories on the Windows PATH that are commonly used for this purpose include: C:\Windows or C:\Windows\System32
- You may need to set your Agent service to run under a specific user login. This may be necessary depending on how SQL Server rights are set up. On each Agent machine, navigate to the Services (Control Panel > Administrative Tools > Services). Scroll down to the QuerySurgeAgent service. Right-click on the QuerySurge Agent service and select Properties.
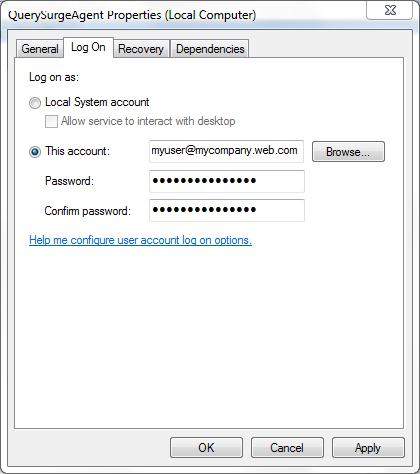
- On the General tab, make sure that the Agent Service status is Stopped. If it is not, click on the Stop button below the Service status notification in the lower portion of the Properties window.
- Click on the Log On tab. Click on the This account radio button.
Use the Browse button to locate the desired login.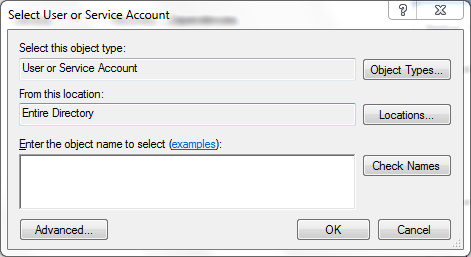
Click on the Locations button and select Entire Directory. You may need elevated permissions for this. Under Enter the object name to select, type the account that you want to run the Agent service under. Click the Check Names button. The full user name should appear in the box. Click OK.
- Once you have the account information, enter the credentials for the account. Click on the Apply button (at lower right). If there is any problem with the credentials, a notification will appear.
- Click on the General tab, and use the Start button to start your Agent Service. Once the Service has started, click OK.
- Make sure to repeat these steps for every Agent installation.